The 10 Best Poses to Relieve Low Back and Hip Pain
Share
Low back and hip pain are common issues that affect millions. Prolonged sitting, poor posture, and lack of physical activity are often the culprits behind this discomfort. But there's good news:
Incorporating yoga into your routine can help alleviate these pains and improve your overall well-being. In this post, we'll explore the 10 best yoga poses to relieve low back and hip pain, providing detailed instructions and visual guides to help you practice safely and effectively.
Understanding the Root Cause
Before diving into the poses, it's important to understand why low back and hip pain occur. Common reasons include:
- Prolonged Sitting: Sitting for extended periods can lead to tight hip flexors and weakened lower back muscles.
- Poor Posture: Slouching or hunching over can strain the spine and surrounding muscles.
- Lack of Physical Activity: Inactivity can cause muscles to become stiff and weak, leading to imbalances and pain.
By addressing these root causes, yoga can provide significant relief and improve your quality of life.
1. Child's Pose (Balasana)
How to do it:
- Kneel on the floor with your toes together and knees spread apart at hip-width.
- Sit back on your heels, then lean forward, extending your arms out in front of you.
- Rest your forehead on the floor and relax your entire body.
Muscles worked: Lower back, hips, glutes.
Benefits: This pose gently stretches your lower back and helps relieve tension in the hips.
Tips: Use a cushion under your forehead or chest if you have trouble reaching the floor.
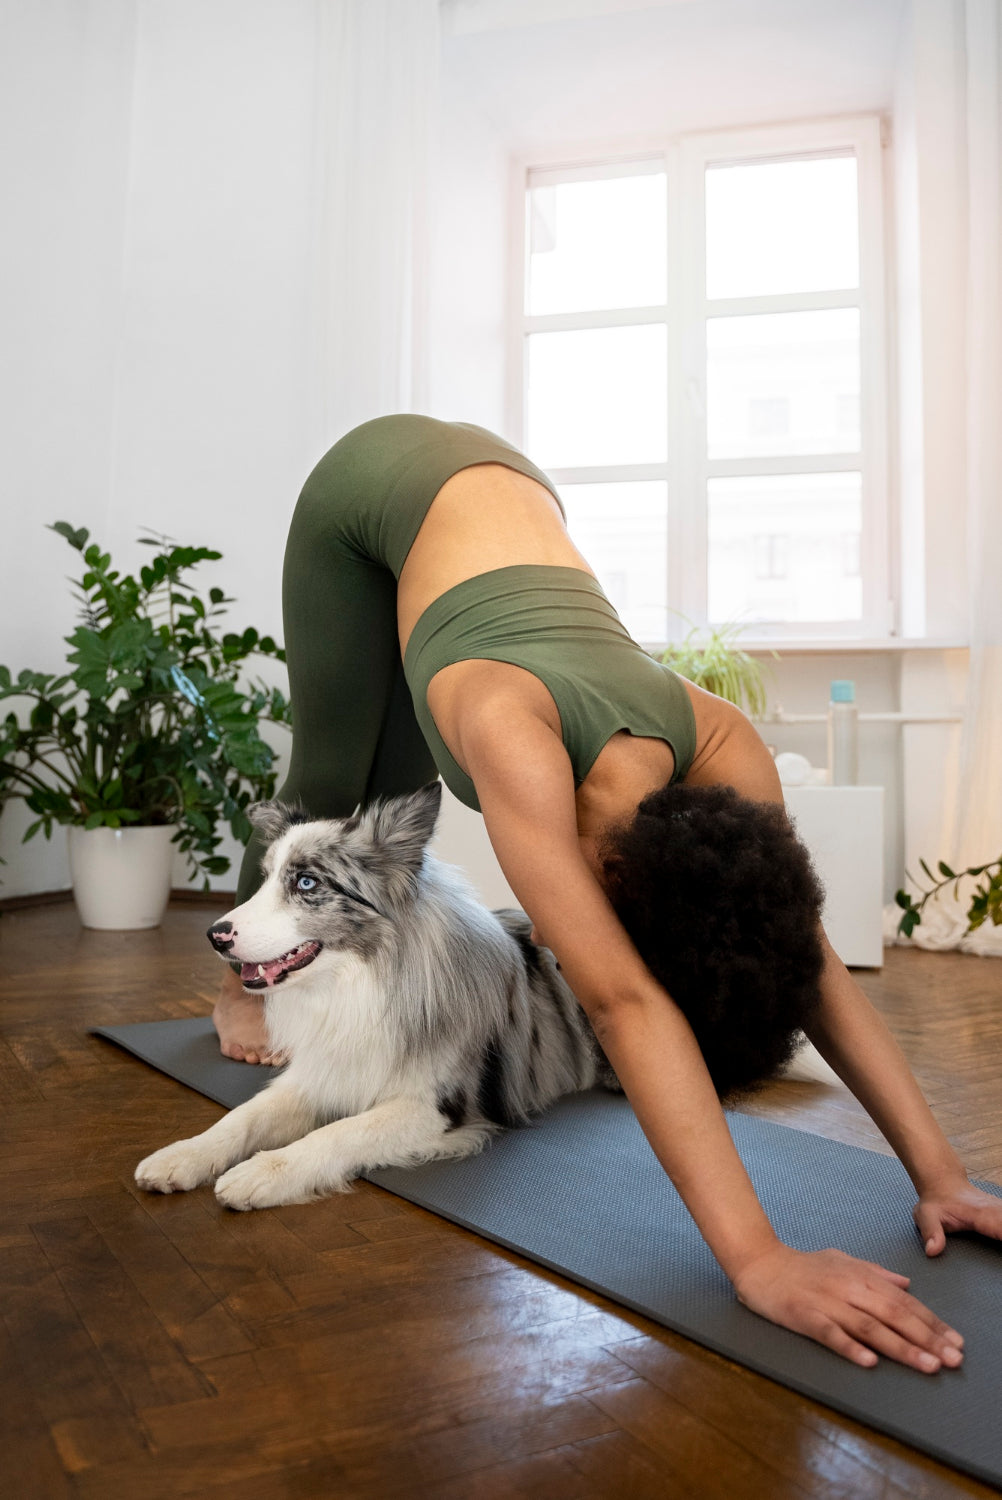
2. Downward Facing Dog (Adho Mukha Svanasana)
How to do it:
- Start in a tabletop position with hands aligned with shoulders and knees with hips.
- Lift your hips up and back, forming an inverted "V" shape with your body.
- Keep your knees slightly bent if you have tight hamstrings.
Muscles worked: Back, hamstrings, calves.
Benefits: This pose stretches and strengthens the entire spine and legs.
Tips: Keep your knees bent if you feel tension in the back of your legs.
3. Cat-Cow Pose (Marjaryasana-Bitilasana)
How to do it:
- Get on all fours with wrists aligned under shoulders and knees under hips.
- Inhale as you arch your back downward (cow pose).
- Exhale as you round your back upward (cat pose).
Muscles worked: Back, abdomen.
Benefits: This pose improves spinal flexibility and relieves tension in the lower back.
Tips: Focus on breathing and smooth transition between the two poses.
4. Pigeon Pose (Eka Pada Rajakapotasana)
How to do it:
- From downward facing dog, bring your right knee forward and place it behind your right wrist.
- Extend the left leg back, keeping the hip squared to the front.
- Lean forward over the bent leg for a deeper stretch.
Muscles worked: Hips, glutes, piriformis.
Benefits: This pose opens the hips and relieves tension in the glutes and lower back.
Tips: Use a blanket under the hip if you can't fully lower it to the floor.
5.Bridge Pose (Setu Bandhasana)
How to do it:
- Lie on your back with knees bent and feet flat on the floor, hip-width apart.
- Press your feet into the floor and lift your hips up.
- Interlace your hands under your back and press your arms into the floor to lift the hips higher.
Muscles worked: Lower back, glutes, hamstrings.
Benefits: This pose strengthens the lower back and glutes, and opens the chest.
Tips: Use a yoga block under the lower back for additional support.
6.Locust Pose (Salabhasana)
How to do it:
- Lie on your stomach with arms by your sides and palms facing up.
- Lift the chest, arms, and legs off the floor simultaneously.
- Keep the neck long and gaze forward or slightly down.
Muscles worked: Lower back, glutes, hamstrings.
Benefits: This pose strengthens the lower back and improves posture.
Tips: Lift one leg at a time if you feel tension in the lower back.
7. Lizard Pose (Utthan Pristhasana)
How to do it:
- From downward facing dog, bring the right foot forward, outside the right hand.
- Lower the left knee to the floor and slide it back for a deep stretch.
- Keep the hands on the floor or lower down to the forearms for a more intense stretch.
Muscles worked: Hips, quadriceps, hamstrings.
Benefits: This pose opens the hips and stretches the leg muscles.
Tips: Use blocks under the hands if you can't reach the forearms to the floor.
8. Happy Baby Pose (Ananda Balasana)
How to do it:
- Lie on your back and bring your knees towards your chest.
- Hold the outer edges of your feet with your hands and open your knees to the sides.
- Keep the lower back on the floor and gently rock from side to side.
Muscles worked: Hips, lower back.
Benefits: This pose relaxes the lower back and opens the hips.
Tips: Use a strap around the feet if you can't reach them with your hands.
9. Reclining Pigeon Pose (Supta Kapotasana)
How to do it:
- Lie on your back with your knees bent and feet on the floor.
- Place the right ankle over the left knee, forming a figure four.
- Lift the left leg and grab the back of the left thigh with your hands.
Muscles worked: Hips, glutes, piriformis.
Benefits: This pose deeply stretches the hips and relieves tension in the glutes.
Tips: Use a strap around the thigh if you can't reach it with your hands.
10. Extended Cat Pose (Utthita Marjaryasana)
How to do it:
- Get on all fours with hands under shoulders and knees under hips.
- Extend the right arm forward and the left leg back.
- Keep the spine long and engage the abdomen.
Muscles worked: Back, abdomen, glutes.
Benefits: This pose improves balance and strengthens the back and abdomen.
Tips: Keep your gaze down to maintain balance.
Incorporating yoga into your daily routine can be a powerful tool for alleviating low back and hip pain. These poses help to stretch, strengthen, and balance the muscles that support the lower back and hips, addressing common issues such as tight hip flexors, weak lower back muscles, and poor posture.
By practicing the 10 poses outlined—Child's Pose, Downward Facing Dog, Cat-Cow Pose, Pigeon Pose, Bridge Pose, Locust Pose, Lizard Pose, Happy Baby Pose, Reclining Pigeon Pose, and Extended Cat Pose—you can significantly reduce discomfort and improve your overall well-being. Remember to listen to your body and modify poses as needed to ensure safety and effectiveness.
To enhance your yoga practice, consider using the Alerse Yoga Mat. This high-quality mat offers several benefits:
Comfort and Support: With its thick cushioning, the Alerse Yoga Mat provides excellent support for your joints, making it easier to hold poses for longer periods without discomfort.
Non-Slip Surface: The non-slip texture ensures stability, helping you maintain balance and avoid injuries during your practice.
Durability: Made from durable, eco-friendly materials, the Alerse Yoga Mat is designed to withstand regular use while remaining gentle on the environment.
Eco-friendly: Alerse yoga mats are 75% recycled and extremely sustainable so you can feel good about your Eco footprint while you practice.
For more detailed guides and additional resources on how to manage pain and improve your health through yoga, visit our yoga mats section, where you will find different types that will help you improve your practice and take it to the next level.
